
Problem
When I perform visuals for shows, I tend to use the laptop screen for choosing video clips. I control effects, mixing videos back and forth, fading in live video cameras, contrast and color and just about everything using a 16 knob midi dial controller while I watch the main output screen(s) and the performers. This basic controller works pretty well for this purpose, but it would be useful to have more specific controls for some of the features of the visuals software I designed and built, as well as a layout that would be more memorable for some of the main features.
Solution
This was a great first step towards a more cohesive controller. The ability to have these controls in closer proximity to each other, rather than as parts of separate devices with wires connecting everything together proved very useful. It allowed me to have the controls that I suspected that I would find useful more closely packed together because I removed the cases for each individual controllers, I didn’t include unnecessary buttons, and the joystick pieces would be very unwieldy to use in their original form. I found myself using this new controller more than my previous knob controller for the additional features, as well as for the ability it gave me to experiment with how these controls would be used. I no longer had to set everything up individually, but could instead plug in one USB cable and be ready to go.
Here is a track I created using the resulting controller to control Apple’s Logic software:
Approach
I’m always keeping my eyes open for different types, sizes, and shapes of controllers and interfaces in general. I decided to take a few off the shelf components and combine them together into one case as a first attempt at a cohesive controller that would be more helpful for my use case.
Since I knew I wanted to combine multiple devices into one case, I grabbed a case that would easily fit all of the USB hubs and devices that I would be using. Then, I started taking apart joysticks, game controllers, and some midi controllers as well to see which ones would be able to be mounted to a flat top surface. Some pieces I decided to add, like the game pad thumb stick, had excess buttons that I had no use for. I desoldered everything from the gamepad board and then soldered on connections for the pieces that I mounted onto the front of the case. I also used the joysticks from the BBC Microcomputer with the gamepad electronics
It also took a while to figure out which USB hub would be the most useful for powering the devices in the case, take those apart, and solder more permanent connections between them.

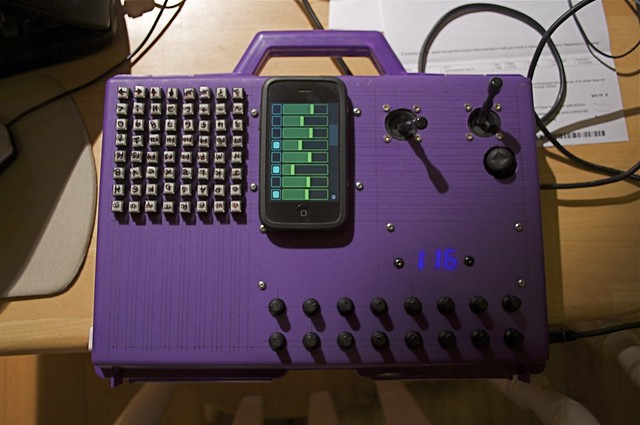
Contents:
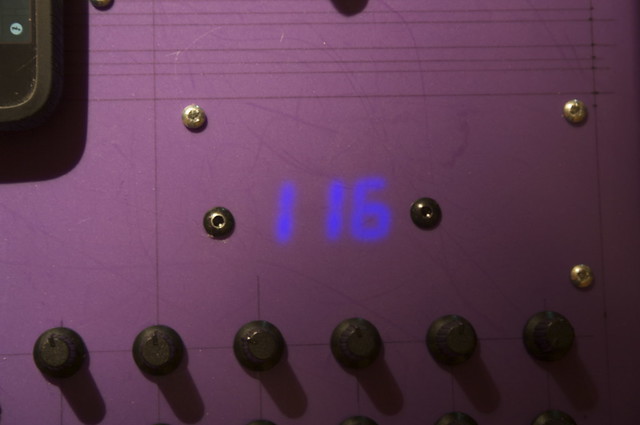
1x Monome 40h kit (64 LEDs and 64 buttons, you can add a tilt sensor)
1x Evolution UC-16 MIDI dial controller (without the settings buttons)
1x Intec XBox controller joystick and controller board
2x BBC Microcomputer joysticks wired into aforementioned XBox controller
1x cheesy purple case from the thrift store
1x USB hub
1x USB A port, external
1x USB B port, external
Some of the component parts could be used as is after partially disassembled. This was enough for the internal USB hub and the UC-16 midi dial controller. The rest were more work.
XBox controllers are really USB devices with a nonstandard connector. To use them on a computer, you have to cut off the original connector and wire a USB connector in its place. With the Mac, you also need drivers. I’m currently using Carvware GamePad Companion for most programs, but Max/MSP can support this and many other devices without the driver.
The most important modification for a game controller when used for musical or alternative controller purposes is to remove the springs from the joystick mechanism. Joysticks are normally designed to spring back to center so that you will be able to more easily find the controls in hand while looking at a screen playing a game. Once you remove the springs, the stick part of the control will stay where you leave it instead of jumping back to the center. This allows that stick to be used as an X and a Y setting that won’t move once you let go. This can be very useful for controlling audio filters, color filters, and the intensity of various audio and video effect plugins.
Here is a previous post on putting together the electronics kit for the monome in this project.

Learnings
I learned a great deal about the merging of multiple devices into one device. For prototyping purposes, my methods worked great. However, moving forward, I would want to interface each individual control into a main control chip. My controller effectively physically combined the devices together, but for software as well as device power, it left a bit to be desired.
The way that I built the grid of buttons means that in order to move forward using the same hardware, I will have to de-solder and re-solder all of those connections. Since I most likely will build newer iterations out of wood, what might have made the most sense would be to build at least this section of the prototype out of either a material that would have been suitable in further iterations, or would be less obtrusive, like black plastic, which could then be inset into a future case.
While having everything in the same box was a good first step with some very useful